Mending Matters: A Beginner’s Guide to Extending the Life of Your Textiles(with Practical Tips!)
In a world saturated with fast fashion and the constant urge to buy new, there’s a quiet rebellion brewing: the art of mending. What was once a necessity is now a powerful act of sustainability, creativity, and even self-reliance. “Mending Matters” isn’t just a catchy phrase; it’s a philosophy that can transform your relationship with your clothes and textiles, saving you money, reducing waste, and fostering a deeper appreciation for the items you own.
Think about it: that beloved sweater with a small hole, those jeans with a ripped knee, that cushion cover with a loose seam. Instead of tossing them aside, imagine giving them a new lease on life with a few simple stitches. Mending might seem daunting if you’ve never tried it, but trust us, it’s more accessible than you think! This beginner’s guide will equip you with the basics and inspire you to pick up a needle and thread.
Why Embrace the Art of Mending?
Beyond the satisfaction of fixing something with your own hands, there are compelling reasons to embrace mending:
- Sustainability Superstar: Extending the lifespan of your textiles is one of the most impactful ways to reduce your environmental footprint. Less demand for new production means less water consumption, fewer chemicals used, and less textile waste ending up in landfills.
- Wallet-Friendly: Repairing your clothes and household linens saves you money in the long run. Instead of constantly replacing worn-out items, you can get more mileage out of what you already own.
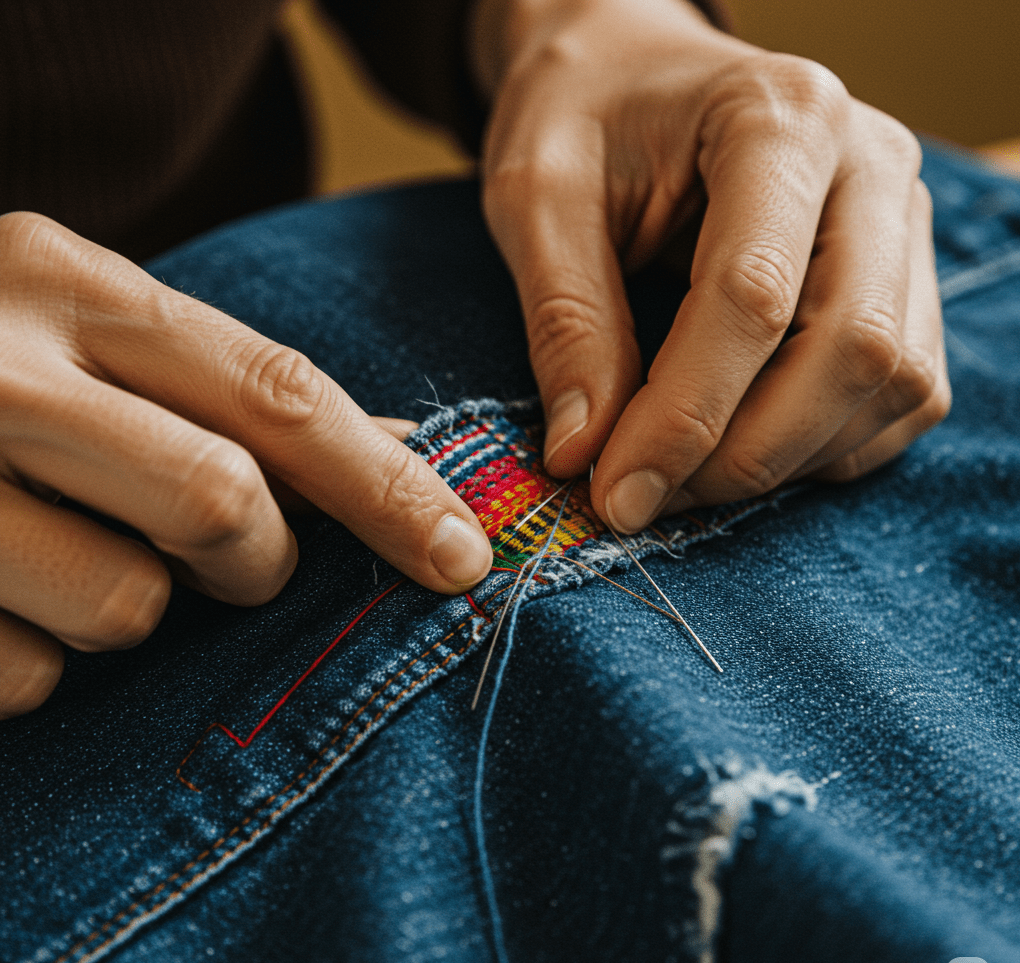
- Unique Style Statement: Mending can be an opportunity for creativity! Visible mending, using contrasting threads or patches, can add a unique and personal touch to your garments, turning flaws into features.
- Deeper Connection to Your Belongings: When you take the time to mend an item, you invest a part of yourself in it. This fosters a greater appreciation for your possessions and can lead to a more mindful approach to consumption.
- Therapeutic and Mindful: The act of hand-sewing can be surprisingly calming and meditative. It offers a break from our fast-paced digital lives and allows for focused, tactile engagement.
Your Basic Mending Toolkit:
You don’t need a fancy sewing machine to get started. Here’s a simple toolkit for basic mending:
- Needles: A set of hand-sewing needles in various sizes.
- Thread: A selection of thread colors that match your frequently worn items. Cotton and polyester threads are good all-purpose options.
- Scissors: Sharp fabric scissors.
- Pins: Straight pins to hold fabric pieces together.
- Seam Ripper: This handy tool helps to undo unwanted stitches.
- Measuring Tape: Useful for measuring tears or patches.
- Iron and Ironing Board: Pressing seams can make your mends look neater and stronger.
- Optional but Helpful: Thimble (to protect your finger), embroidery floss (for decorative mending), and fabric scraps for patching.
Essential Mending Techniques for Beginners:
Let’s dive into a few basic mending techniques you can master:
- Sewing a Straight Seam: This is the foundation for many repairs, like fixing a ripped seam in a garment or closing a tear in a straight line.
- How-to: Thread your needle and tie a knot at the end. With the right sides of the fabric facing each other, align the edges you want to sew. Use pins to hold them in place. Starting a little before the end of the tear, push the needle through both layers of fabric from the back to the front. Bring the needle back down a short distance away, creating a stitch. Continue this running stitch along the seam, keeping your stitches relatively even. Knot the thread securely at the end.
- Patching a Hole (Simple Method): Perfect for covering small holes in jeans, sweaters, or other fabric items.
- How-to: Choose a patch fabric that complements or contrasts with your garment. Cut the patch slightly larger than the hole. Position the patch over the hole on the wrong side of the fabric. You can use pins or fabric glue to hold it in place. Thread your needle and, starting from the wrong side, stitch around the edges of the patch, attaching it securely to the garment. You can use a simple running stitch or a more secure whipstitch.
- Securing a Loose Button: A surprisingly common and easy fix!
- How-to: Position the button back in its original spot. Thread your needle and knot the end. Starting from the wrong side of the fabric, bring the needle up through one of the buttonholes. Sew through the buttonhole and back down through another hole, catching a bit of fabric on the wrong side each time. Repeat this several times, going through all the buttonholes to secure the button firmly. Finish with a knot on the wrong side.
- Hemming Basics (Hand Sewing): Shortening curtains or pants can be done with a simple hand-sewn hem.
- How-to: Fold the fabric edge up to your desired hem length and press it with an iron. Fold the raw edge up again to create a clean finish and press again. Pin the hem in place. Thread your needle and knot the end. Using a slip stitch or a blind stitch, carefully sew the folded hem to the main fabric from the inside, making your stitches as invisible as possible on the right side.
Tips for Successful Mending:
- Start Simple: Don’t be intimidated! Begin with easy repairs like sewing a straight seam or reattaching a button.
- Good Lighting is Key: Ensure you have ample light to see your stitches clearly.
- Don’t Aim for Perfection: Especially when you’re starting, focus on making the repair secure. A little character in your mends is perfectly acceptable!
- Practice Makes Progress: The more you mend, the more comfortable and skilled you’ll become.
- Embrace Imperfection (Visible Mending): If you’re feeling adventurous, explore visible mending techniques using contrasting threads, decorative stitches, or patches to make your repairs a deliberate design element.
The Mending Movement is Growing:
Joining the mending movement is about more than just fixing clothes; it’s about cultivating a more mindful and sustainable way of life. It’s about valuing what we have, embracing imperfections, and taking a small but significant step towards a less wasteful future. So, dust off that sewing kit, take a deep breath, and start with that one item you were about to discard. You might be surprised at the satisfaction and sense of accomplishment that comes with saying, “I mended that myself.”